Program Notes
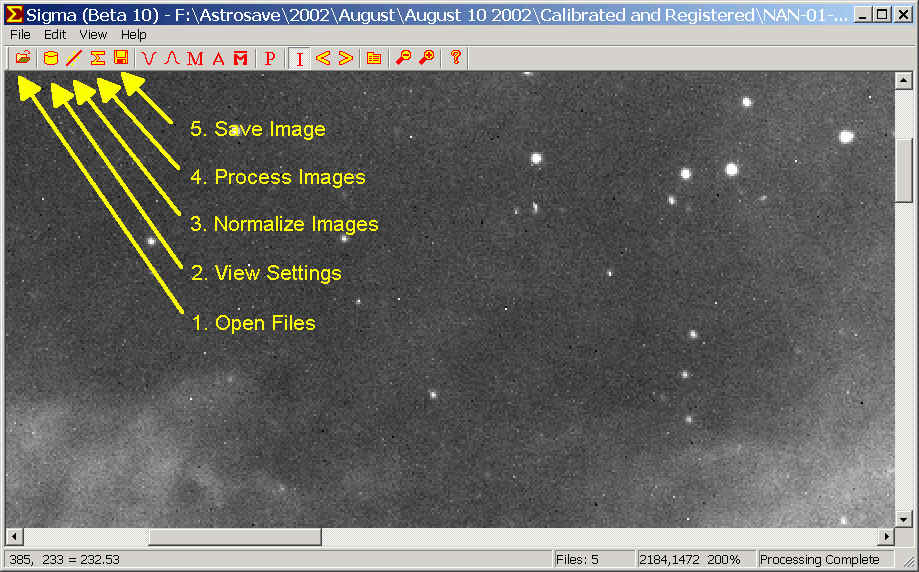
1. Click to open or add files. You can close files from the menu.
2. View settings - main use is to set normalization percentage for "Normalize Images" command.
3. Normalize images does a least-squares fit of each image set and applies a linear factor and offset to each image set to compensate for such things as changing transparency. Useful for flats and light images. DO NOT use with dark images. This command is not needed before doing a "Process Image" command. It is useful only if you want to actually see what the normalized images look like. This command recalculates the min, max, median, etc. views after the normalization.
4. Displays a dialog box with settings to apply when processing the image. Discussed more below.
5. Saves an image after a combine. The Save Dialog box has a drop down list box to select the specific image to save. Also you can choose the output format (16-bit integer or 32-bit float). Be careful of overflow (pixels greater than 65535) if you output as16-bit integer as there is no stretch option at this time.
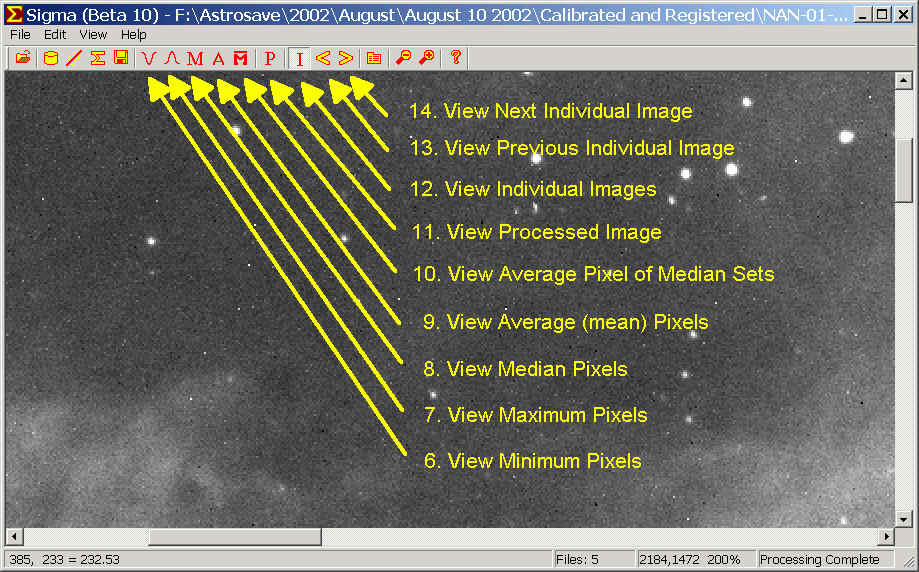
6. Displays the minimum value pixel in the image set
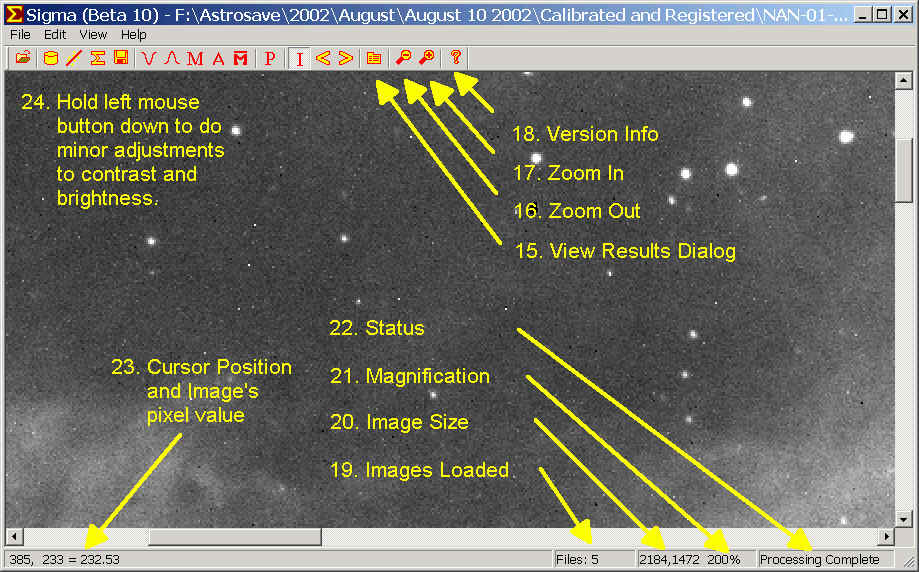
15. After processing an image set a results dialog is displayed. After you close that dialog you can re-open it by clicking this button.
16. Zoom Out. You can view an image at 100% to 800% magnification in factors of 2. This button is active if at 200% magnification or more (see 21).
17. Zoom In. This is active if magnification is less than the maximum (800%)
18. Opens a dialog with program version info and contact information.
19. Number of images loaded
20. Image size in pixels.. All images must be identical in size.
21. Magnification. Range is 100-800%. You can scroll around with the scroll bars.
22. Last status message.
23. Cursor position and image's pixel value.
24. A small amount of contrast adjustment is available by moving the mouse around with the left mouse button down. Left click again and move a very small amount to reset.
Process Images Dialog
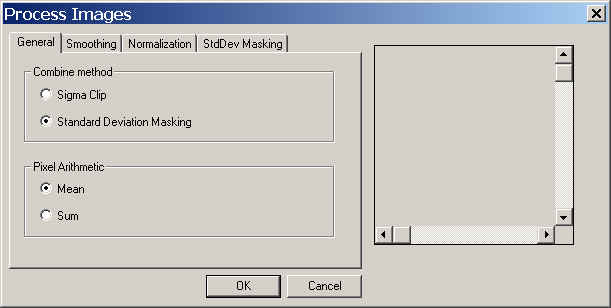
To use the classical Sigma Clipping algorithm choose "Sigma Clip" however I think I have obtained better results with my own algorithm, which I call "Standard Deviation Masking". I recommand you use that option.
For Darks and Flats: Use MEAN Pixel arithmetic.
For Light Images: Use Sum (or Mean).

After processing the images Sigma can analyze the processed image for hot or cold pixels that might not have been removed when processed. This option, called smoothing or despeckling further reduces noise.
WARNING: This option should be turned off for darks! Use cautiously on light (and not recommended for flats although you can try if you want to obtain a smoother flat)... I recommend a sigma of at least 2.0 or higher for high-valued pixels. Choosing a sigma too low will clip the brightest pixel in stars!
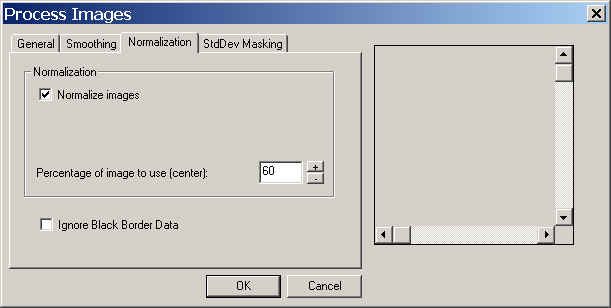
"Normalize Images" is required for flats and recommended for light images. If clouds or another external light source effects one of your images this option can hurt more than help. If the combined result looks unexpectedly weird try turning off normalization.
The"Ignore Black Border" option will cause Sigma to automatically reject zero-valued data in an image. Zero-valued data is usually caused by another program registering (rotating) the image and leaving borders with basicaly no data.
Neither option should be used for darks.
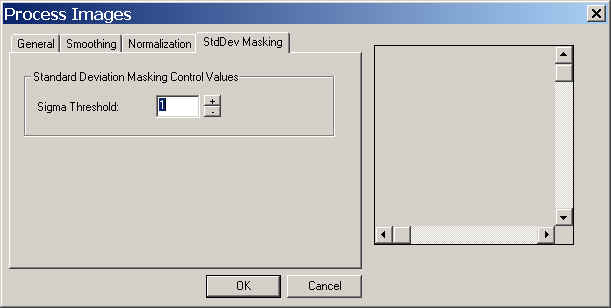
The last page sets the sigma threshold which is used to determine which pixels will be rejected from use. This value is set by trial and error. Start with a value of 1.0 and adjust the value based on the Results Dialog (see next section) you get after processing. Press OK to process the image. All options are saved in the registry and are remembered between invocations of Sigma.
Results Dialog
NOTE: THIS MAY BE THE MOST IMPORTANT SECTION!
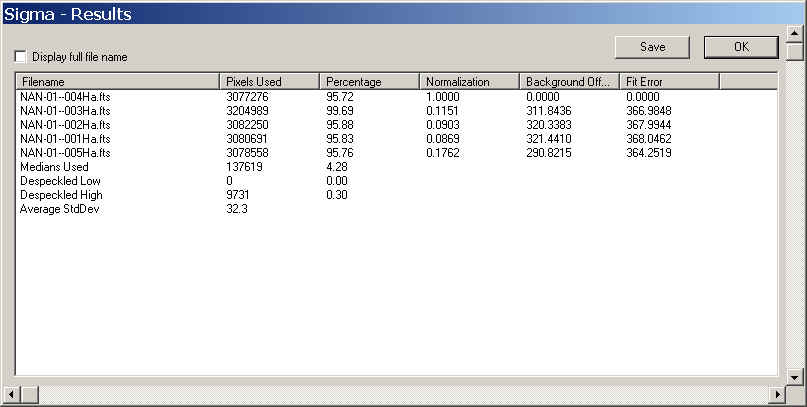
You should use the "Results Dialog" to determine how well the data was processed. The last line is the Average Standard Deviation. The lower that number is the better the processing was. On a good set of images the value is usually less than 20.
Take a look at the "Percentage" column. You should shoot for 95-98% of pixels used in each image. If the percentage is too low you may want to reprocess the images with a HIGHER sigma value. If the percentage is too high (say 99+%) you are not rejecting enough pixels. You should reprocess the images with a LOWER sigma value. The total number of pixels that Sigma rejected for a mean combine and instead used the median combine is indicated by the "Medians Used" value. This should be in the range of 2-5% for an SBIG ST-7/8/9/10 series camera.
Also keep a close watch on how many pixels were despeckled. You may want to adjust the (low or high) sigma's for despeckling if the percentage is higher than a few tenths of a percent.
Lastly, take a look at the normalization fit error. The first image is always the reference image so the error is always going to be zero. But if any of the others is significantly higher than each other then maybe something is wrong with that image. You should consider reloading the image set without that bad image. A future version of Sigma will allow you to reject whole images without reloading.